UCTRONICS Ultimate Pi Rack Build

Intro
Since building out my workshop (at least enough to be useful) I've started working on some hobby projects. A more in depth blog post on my workshop is yet to come, but I've been working remotely from there as software engineer at Twitter for a while now.
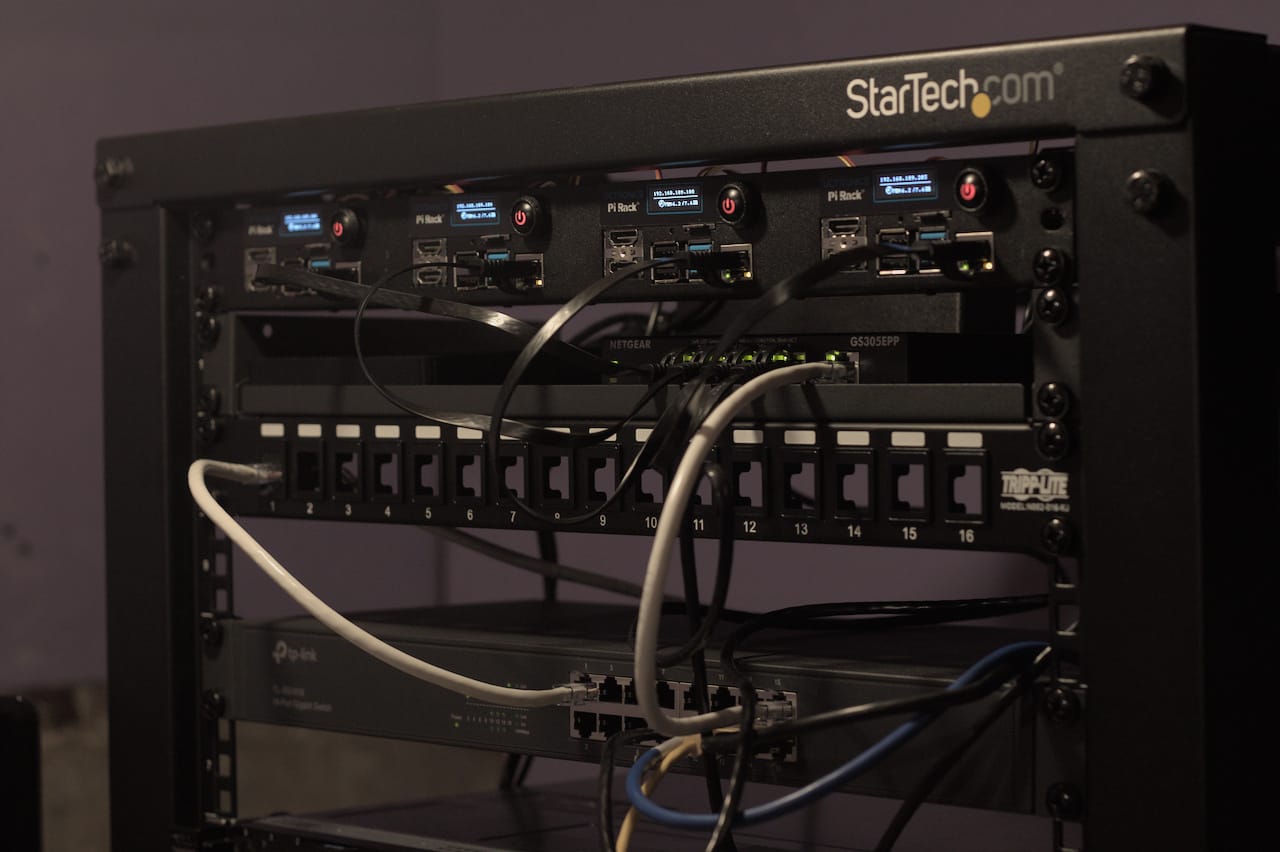
As a bit of a reward for setting up a permanent work from home setting I bought a 12U rack and what better use for something meant for big iron than to immediately install some little iron, Raspberry Pis!
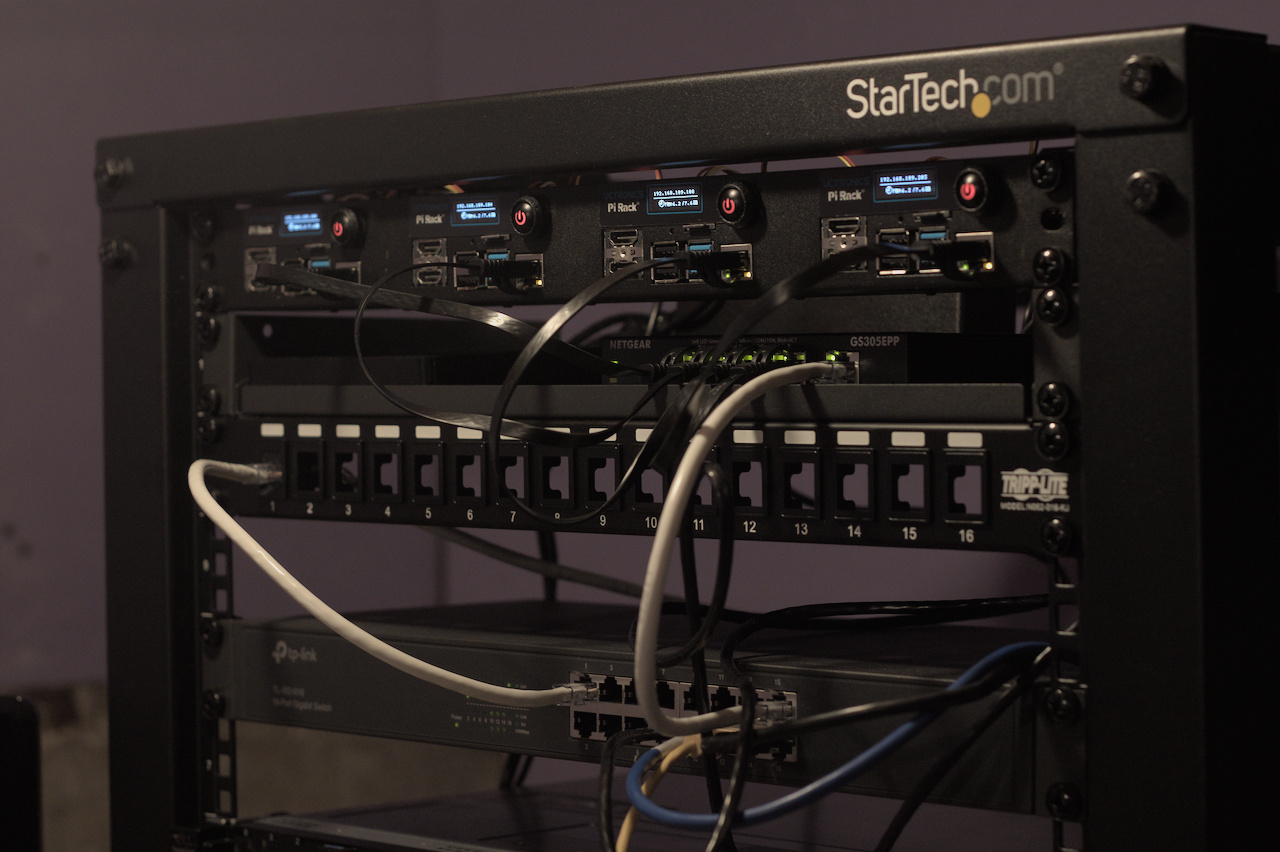
I came across UCTRONICS 1U "Ultimate Pi Rack" and love that it comes with some great pieces of kit to integrate a cluster of Pis into a rack.
Hardware
The kit includes
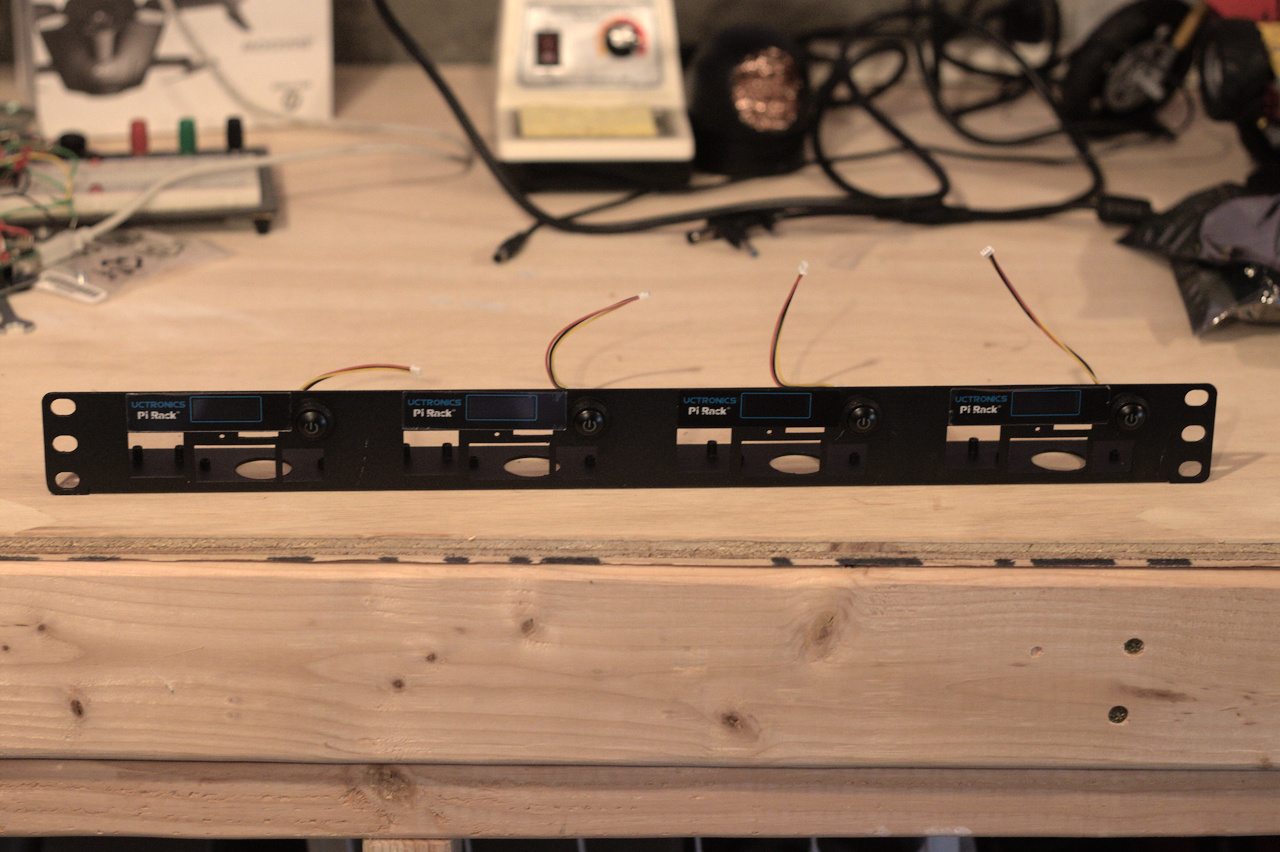
- 1x 1U rack mount
- 4x POE hats w/ fans, and power button and display headers
- 4x micro-HDMI to HDMI relocators
- 4x SD slot relocators
- 4x OLED displays
- 4x power buttons
- 4x CAT5 patch cables

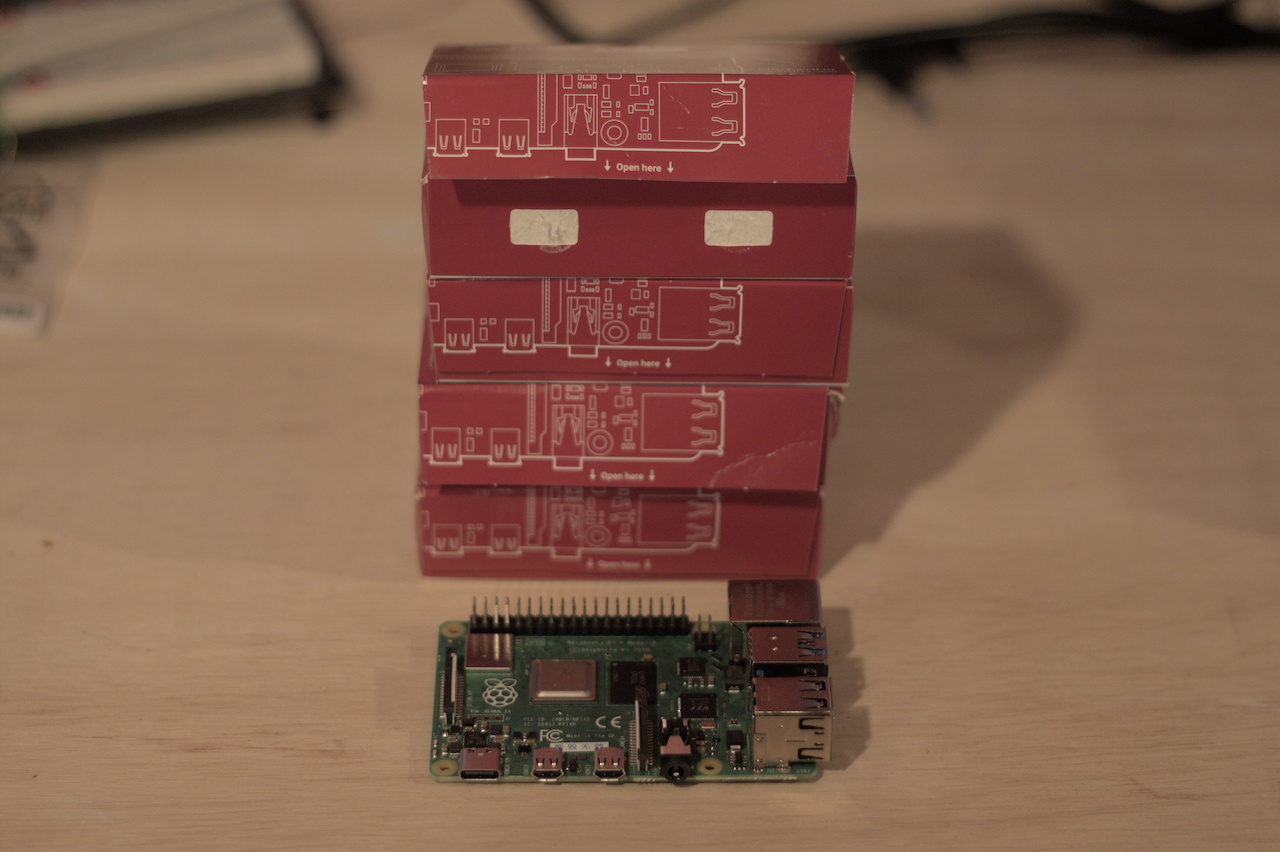
You need to supply your own Raspberry Pis and SD cards. You also have to provide power to the Pis. You can do that with their own power adapters, but since the kit includes POE hats, it is likely you would choose to power them that way. For that reason and in order to keep the cabling to a minimum I chose to use a NetGear GS305EPP POE 5 port managed switch. I don't have other POE equipment at my house yet, and rather than attempt to future proof by dropping the money on a switch with a larger number of POE ports I decided to get just what I need for this build.

Assembly
Upon unboxing the kit, you should inspect the POE hats' headers. One of mine had some headers slightly bent, but not so badly that I considered it damaged. I carefully straightened them before connecting to the Pis.

I also noticed more than one set of nuts and bolts had come loose on the fans included on the POE hats, so make sure you find all those and snug them up. It's especially important that a nut or bolt is not hiding in between the blades of the fan as cooling is crucial, and that nothing could be shorting any of the exposed electrical terminals
When I initially installed the standoffs that support the hats, I added not only the nut at the top, but a screw from the bottom. You should not include the bottom screw until you are mounting each pi into the 1U bracket, they help secure it in place, along with two more screws that secure the micro-HDMI to HDMI relocators to the bracket. Furthermore, it takes a little fiddling to get all of the ports lined up with the bracket's openings, so get that all squared away before tightening any fasteners.

After the Pis are mounted on the bracket, you can connect the power button and display wires to the headers on the POE hats. Finally it's time to mount the whole thing into your rack. The bracket comes with 6 holes for mounting bolts (3 on each side). Although I imagine this lightweight package would be secured fine with just 2 bolts and 2 cage nuts (in the middle holes), I chose to use 4 at the corners.
Connect the Pis up to your power source(s) and you're almost ready to boot.

Operating System
Many people go with Raspberry Pi OS or Raspbian (which is based on Debian) for their operating systems, but I went with Ubuntu because of my familiarity with it and some tutorials I planned to follow being based on Ubuntu. The full set up of the operating system is not something I feel like repeating here, suffice it to say there are plenty of resources for that elsewhere on the web.
Software
If you choose to install Ubuntu on your Pi's and follow the instructions on UCTRONICS' github page, beware that there are a couple of errors in the documentation (unless this pull request has been landed by the time you read this). The code compiles and runs without problems, but in order to run the code automatically at startup, you'll need changes like listed here in this pull request I made on GitHub.
This is the first article of a few ideas I have for homelab related posts, and one of those should probably be what I ended up utilizing this cluster for. A very common use case is to learn about running Kubernetes, and although I wouldn't try to cover that topic myself, if I use it for something interesting I will write that up as well.
Links
LearnLinuxTV's Building a 10-Node Kubernetes Cluster on Raspberry Pi & Ubuntu Server